Restoring the Source Link
If a source used in EDIUS is moved/deleted, the link between the source and EDIUS is lost, and the source cannot be referred from the clip. Clip that cannot refer to source will become an offline clip that video and audio are not displayed. The following section describes the method for supporting restoration of an offline clip.
If there are offline clips on the timeline, an icon to indicate the presence of offline clips and the number of the offline clips are displayed on the timeline status bar.

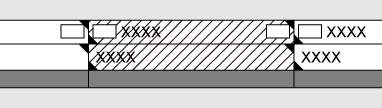
An offline clip on the timeline is displayed as below, and the video and audio are both muted during playback.
Restoring an Offline Clip
Select a restoration method for the offline clips.
1) Click the [Open Project] list button on the timeline.

2) Click [Restore Offline Clip].
-
The [Restore and transfer clip] selected dialog box appears.
 Alternative
-
Click [File] on the menu bar, and click [Restore Offline Clip].
|
|
|---|
|

[Restore and transfer clip] Selected Dialog Box
|
[Find from captured files] |
Search the source by reel number (Ubit) and timecode (between In and Out points) in already captured files. |
|
[Open the clip restoration dialog] |
The [Restore and transfer clip] dialog box appears. Restore the offline clips by reestablishing a link to the disconnected source, by retransfer the source that cannot reference a part of the clip, or by replacing a camera proxy file with a high-resolution source. |
|
[Close] |
Click [Close], and click [Yes] to display the operation screen without restoring the offline clip. |
Re-link and Restoration
You can search for the source from the storage to re-link.
1) Click [Open the clip restoration dialog] in the [Restore and transfer clip] selected dialog box.
-
The [Restore and Transfer Clips] dialog box appears.
Alternative
-
To restore the clips on the timeline, double-click the offline clip icon on the status bar. In this case, only the offline clips on the timeline are displayed in the clip list in the [Restore and Transfer Clips] dialog box.
2) Select the target range of the clip from the [Range] list.
3) Select a clip (or clips) from [Clip list], and select either [Relink (select file)] or [Relink (select folder)] from the [Restoration Method] list.
4) Select the source from the [Open] dialog box, and click [Open].
-
Selecting a file to be re-linked in the [Open] dialog box will show the check result of consistency with the original file.
Checking [link only files that perfectly match] will re-link only files that have exactly the same information as the original files.
-
Clips with different frame rates can also be re-linked.
-
If [Relink (select folder)] is clicked in step 3) , select a folder in the [Browse For Folder] dialog box and click [OK].
5) Click [OK].
6) Click [Close] in the [Restore and transfer clip] selected dialog box.
Alternative
-
Double-click a offline clip on the timeline or in the bin window, and perform operations after step 3) .
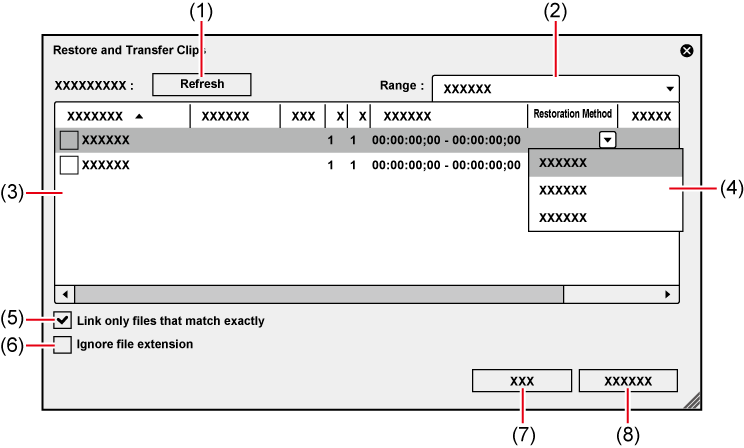
[Restore and Transfer Clips] Dialog Box
|
(1) |
[Refresh] |
Restore clips to which the restoration method is set. |
|
(2) |
[Range] |
Select the target range of the clips from the list. |
|
(3) |
Clip list |
Clips whose links to the source are disconnected.
Clips whose links to the source are restored. |
|
(4) |
[Restoration Method] |
[Relink (select file)] The [Open] dialog box appears. Select the source to re-link. [Relink (select folder)] The [Browse For Folder] dialog box appears. Search the source with the same name in the specified folder to re-link. [Undo transfer] Re-link the original source prior to the transition to the project folder. [Do nothing] Offline clips are not re-linked or captured. |
|
(5) |
[Link only files that match exactly] |
Check this item to specify only the files with exactly the same information in the original file to be re-linked. |
|
(6) |
[Ignore file extension] |
Check this item to include files with different extensions for re-link. |
|
(7) |
[OK] |
Restore the offline clips with the specified settings. |
|
(8) |
[Cancel] |
Close the dialog box without restoring the offline clips. |
 : Offline clips
 : Clips with restored links

-
You can change the default setting of [Restoration Method].
Searching File by Reel Number to Restore
Search the source by reel number (Ubit) and timecode (between In and Out points) in already captured files.
1) Click [Find from captured files] in the [Restore and transfer clip] selected dialog box.
-
The [Restore Offline Clip] dialog box appears.
-
Search a file in a folder where the project is saved. If you cannot find the file, click [Select Folder] and select a folder where the captured files are stored, and click [OK].
2) Click [Restore All].
-
To restore selected files only, select a clip from [Find clip list] and click [Restore].