Changing Clip Information and Content
This section explains how to check the information of the clip and change settings.
Editing Properties
Change the frame rate or specify the start timecode of a clip using the [Clip Properties] dialog box or in the properties view.
Editing Properties in [Properties] Dialog Box
Display the [Properties] dialog box and edit the properties.
1) Right-click a clip in the bin, and click [Properties].
-
The [Clip Properties] dialog box appears.
 Alternative
-
Displaying properties: [Alt] + [Enter]
2) Edit the settings, and click [OK].

-
The properties of a clip placed on the timeline can be displayed. Right-click on a clip on the timeline, and click [Properties].
[Clip Properties] Dialog Box
The displayed tab varies according to the type of clip.
|
[File] tab |
Check type, data size and other details of files. You can also rename clips, rename reels, enter comments, and change the clip display color. |
|
[Video] tab |
Check the start TC (timecode), end TC or image size. You can also change the start TC, poster frame, aspect ratio, color space, color correspondence range, field order, and frame rate. To return the settings to their state at capture, click [Back to Default Settings]. |
|
[Audio] tab |
Check the start and end TCs, or re-acquire wave information (waveform representation of audio). For clips placed on the timeline, you can set playback methods for the clips. The setting items will differ depending on the number of audio channels that the selected clip has. |
|
[Still image] tab |
Check the format or image size. You can also change duration, aspect ratio, color space, and color correspondence range. |
|
[Extended] tab |
Check the expansion information of a file or clip. The details displayed differ depending on the clip type. |
|
[Captions] tab |
Check [Use Caption data] to use the caption information. If a closed caption file has been merged to the file, the saving destination of the currently referenced file can also be confirmed. |

-
In [Color Space] in the [Video] tab, color spaces of clips are automatically recognized and displayed.
If the color space of a clip is not recognized automatically, you can change it manually by clicking the list button of [Color Space] in the [Video] tab.
Editing Properties in Properties View
You can edit properties in the properties view of the bin.
1) Select a clip in the bin.
-
You can select multiple clips.
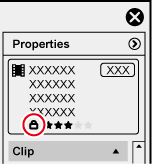
2) Click [Edit Properties] in the properties view.

-
The properties view is unlocked, and editing is enabled.
3) Click [Clip] in the properties view.
-
The properties of [Clip] are displayed.
4) Edit properties.
5) Click [Edit Properties] in the properties view.
-
Editing of the properties view is locked.
Checking Clip Save Destinations
Display the save destination folder for the clip.
1) Right-click a clip in the bin, and click [Explorer].
-
Explorer starts up, and the save destination folder for the clip is displayed.
Opening Files with Software
You can open a file with application software associated to the file, for example, by opening *.psd files in Photoshop.
1) Right-click a clip in the bin, and click [Open].
-
Open the file with the application software associated to the file.

-
You can open a clip placed on the timeline by the associated application software by the following operation:
-
Right-click a clip placed on the timeline, and click [Open].
-
Click a clip placed on the timeline, and click [Clip] on the menu bar → [Open].
-
Opening clips placed on the timeline: [Shift] + [Ctrl] + [P]
-