Trimming Type
The following explains the features of each trimming type. For details on methods of operation, see the respective page.
Trimming on the Preview Window
Trimming by Entering the Timecode
In point trim/Out point trim
Change the In and Out points of clips placed on the timeline.
The edit result is dependent on the edit mode.
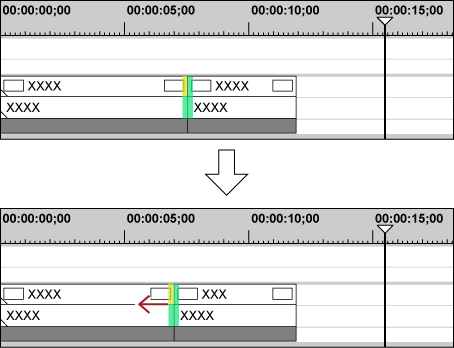
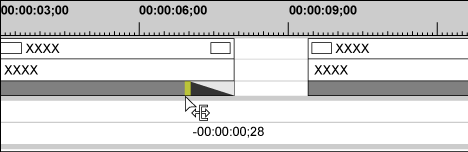
When the Out point side of the clip has been trimmed by a shortcut key (rippled mode off)

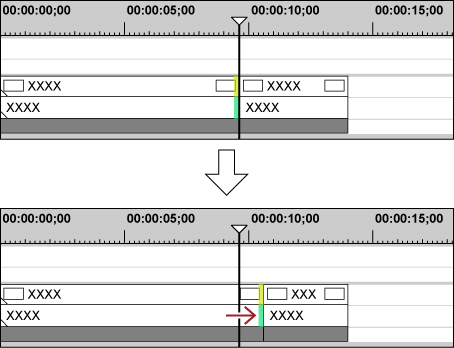
In the Overwrite Mode
If you extend a clip, the subsequent clips shorten. If you extend the clip longer than the subsequent clips, all subsequent clips will be overwritten.

-
Even if the ripple mode is off or the overwrite mode is set, neighboring clips can be fixed to prevent subsequent clips from being overwritten by mistake during trimming.
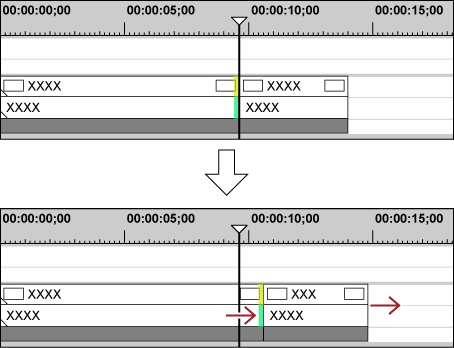
In the Insert Mode
If you extend a clip, the subsequent clips are shifted backward.
-
You can move a clip together with all the subsequent clips.
-
You can trim the Out point of the clip by the following operation.
-
Select and right-click a clip, and click [Duration]. In the [Duration] dialog box, enter the playback time from the In point.
-
Select the clip and press [Alt] + [U] on the keyboard. In the [Duration] dialog box, enter the playback time from the In point.
-
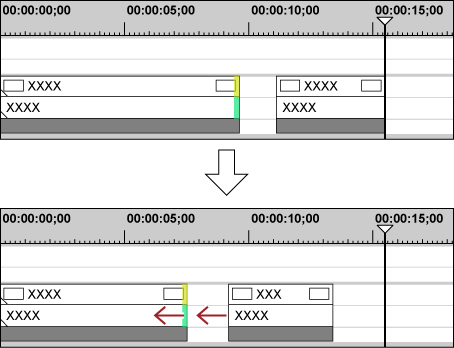
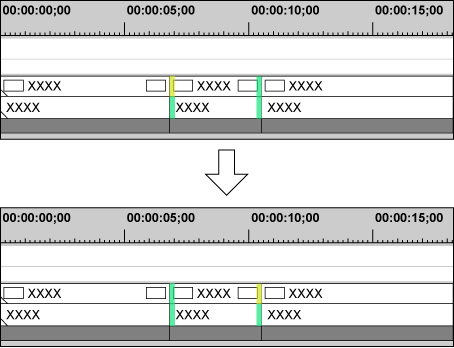
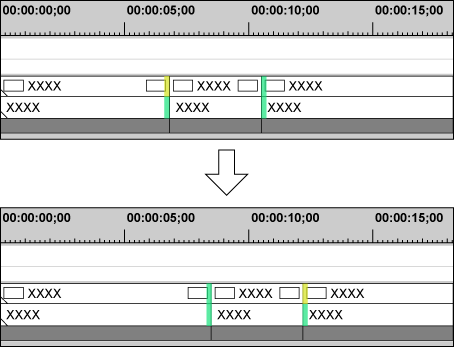
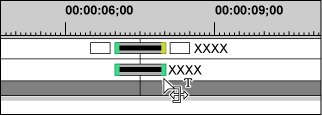
Ripple Trim
Change the In and Out points with the positional relationship with other clips maintained. Trimming is performed with the ripple mode on. Even if the ripple mode is off, ripple trimming is possible by using combinations of shortcut keys and keyboard operation.
When trimming the Out point side of the clip
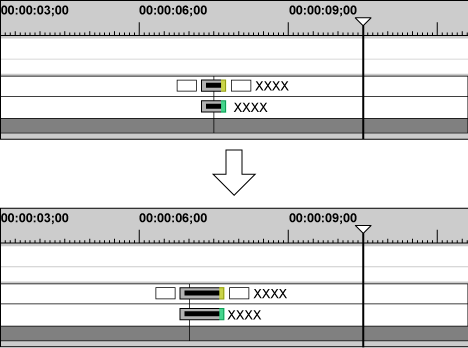
Split Trim
You can trim only the video section or audio section of video clips with audio.
-
When the ripple mode is on, you cannot perform trimming if there is no gap between the trimming clip and the subsequent clip. Also, trimming can be performed by the length of the gap if the gap is shorter than the trimming clip.
When trimming the Out point side of a video clip with audio (video part)
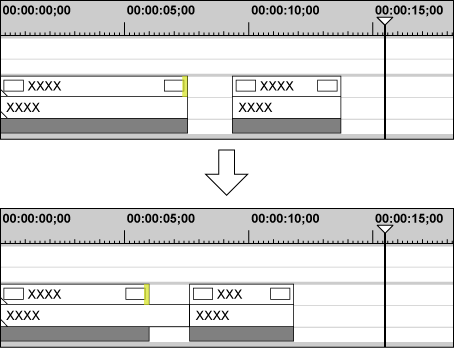
Slide Trim
Shift the start and end points of the neighboring clips forward and backward. The total length of the previous and subsequent clips remains unchanged.
-
You cannot perform trimming if there is no margin between the trimming clip and the adjacent clips. When trimming clips with margins, trimming can be performed by the length of the margin of the clip.
Slip Trim
You can change the area of the clip to use, without changing the length or position of the clip. The length or position of the neighboring clips remain unchanged.
-
You cannot perform trimming if the trimming clip has no margin. When trimming clips with margins, trimming can be performed by the length of the margin of the clip.
Rolling Trim
Shift the start and end points of the previous and subsequent clips without changing the length of specific clips.
Adjust the range to be used while checking the video displayed on the preview window.
-
You cannot perform trimming if the neighboring clip has no margin. When trimming clips with margins, trimming can be performed by the length of the margin of the clip.
Trimming Transitions/Audio Cross Fades
You can trim the length of transitions (clip transitions, track transitions)/audio cross fades in the same way as clips.
When trimming the Out point of a clip transition:
Track transition
Both edges of a transition/audio cross fades can also be trimmed at the same time.
-
You can change the length of the title mixer by dragging in the same way as for the clips.
-
You can extend the clip transition/audio cross fades by the margin of the clip.
-
You can change the default duration value.