Setting Marker to Source

-
A marker set to an asset on Mync can be utilized on EDIUS as a clip marker.
Displaying the [Clip Marker] List
Display the [Clip Marker] list in the [Marker] palette.
1) Click [Toggle Window Display] of the timeline.

2) Click [Marker].
 Alternative
-
Click [View] on the menu bar, and click [Window] → [Marker].
-
Click [View] on the menu bar, and click [Window] → [Show All] or [Hide All], to show/hide all the tab windows at one time.
-
Showing/hiding the tab window: [H]
Showing/Hiding [Information] Palette
Showing/Hiding [Effect] Palette
-
When the show/hide setting for the [Marker] palette is switched, the show/hide setting for the tabs of the bin window, source browser window, and tab windows combined with the [Marker] palette is also switched. To switch the show/hide setting separately, release the association of the window or tab windows.
3) Click [Toggle Sequence Marker/Clip Marker] in the [Marker] palette.
-
Each click switches between the [Clip Marker] list and the [Sequence Marker] list.

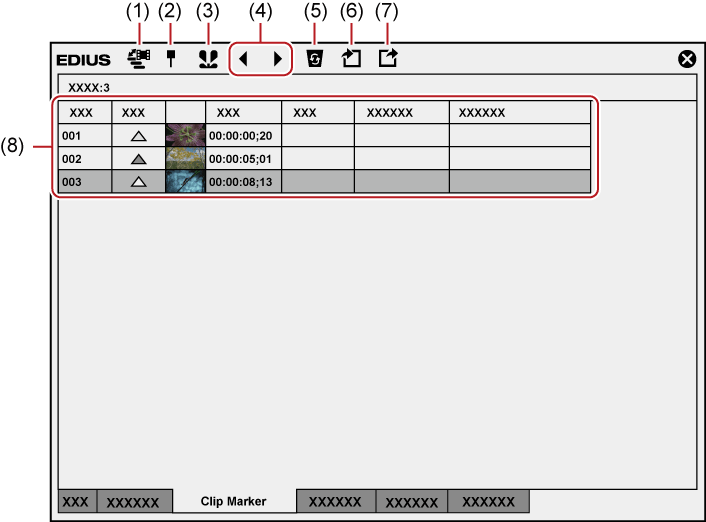
[Clip Marker] List
|
(1) |
[Toggle Sequence Marker/Clip Marker] |
Switch between the [Clip Marker] list and the [Sequence Marker] list. |
|
(2) |
[Set Marker] |
Add the clip marker to the position the slider on the Player. |
|
(3) |
[Set Marker In/Out] |
Add the clip marker with range to between In and Out points of the clip currently displayed on the Player. |
|
(4) |
[Go to Previous Marker]/[Go to Next marker] |
Move to the previous/next clip marker. |
|
(5) |
[Clear Marker] |
Select and delete a clip marker from the clip marker list. |
|
(6) |
[Import Marker List] |
Import a clip marker list. |
|
(7) |
[Export Marker List] |
Export the clip marker list as a CSV file. |
|
(8) |
Clip marker list |
Display the thumbnail, timecode or comment of the set clip marker. Click [Color] to change the color of the clip marker. |
|
|
|---|
|

Setting Clip Markers at Capture
You can set markers to source clips while sources are being captured.
-
The color of the clip marker that can be set at the time of capturing is orange. Clip markers in other colors cannot be set.
1) Start the source capture.
2) At the scene to which the clip marker is to be set, click [Add Marker] in the [Capture] dialog box.
-
The list of set markers is displayed. Enter a comment, if necessary.
-
Multiple clip markers can be added by shortcut keys by the following operation. At the scene to add the clip marker to, press [V] on the keyboard, and enter the comment as required. To continue to add clip markers in scenes, press [Ctrl] + [M] on the keyboard, and enter the comment as required.
Setting Clip Markers
You can set clip markers to source clips registered to the bin and to the source currently displayed on the Player.
-
The default color of clip marker is orange. The color of clip markers can be changed on the [Clip Marker] list.
1) Display the source on the Player.
2) Move the slider on the Player to the clip marker setting position.

3) Click [Set Marker] in the [Clip Marker] list.
-
The clip marker is displayed for slider on the Player, and the timecode of the clip marker is displayed in the [Clip Marker] list.
 Alternative
-
Click [Marker] on the menu bar, and click [Add Marker].
-
Right-click the clip marker list, and click [Set Mark].
-
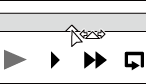
Right-click the slider on the Player, and click [Set clip marker/Clear clip marker (Toggle)].
-
Setting clip markers: [V]
-
You can move marker positions by the following operation.
-
Click the timecode at [In] in the [Clip Marker] list, and enter the desired numerical value.
-
Drag the clip marker on the position bar on the Player with [Ctrl] on the keyboard held down.
-
-
You can enter comments at the same time you are setting clip markers.
Click [Marker] on the menu bar, and click [Edit Marker] to enter the comment.
|
|
|---|
|
Adding Clip Markers to a Clip Placed on Timeline
You can use keyboard shortcuts to add clip markers to a clip placed on the timeline.
In this example, an orange-colored clip marker is added to a clip on the timeline using the keyboard shortcut for [Set marker to selected clips].
-
The keyboard shortcut needs to be assigned in advance to the operation that adds a clip marker to a clip on the timeline.
-
Other than [Set marker to selected clips] that adds an orange-colored clip marker, keyboard shortcuts can be assigned to the following operations.
-
Specifying color and range of a clip marker and adding it to a clip on the timeline
-
Editing/deleting a clip marker of a clip on the timeline
-
Using the keyboard shortcut for [Set marker to selected clips]
1) On the timeline, select a clip to add a clip marker.
-
You can select multiple clips.
2) Move the timeline cursor to the position where a clip marker is to be added.
3) Press the keys set as keyboard shortcut.
-
An orange-colored clip marker is added to the selected clip.
-
The timecode and other information of the set clip marker are added to the [Clip Marker] list.
-
When no clip is selected on the timeline, a clip marker will be added to a clip which is on the position of the timeline cursor of the selected track.
-
Clip markers can be set even to disabled clips and clips placed on disabled tracks.
-
Clip markers cannot be set to color bar clips and color matte clips.
-
If you set a clip marker in a clip transition range, the clip marker will be added to the two clips before and after the transition.
-
If you use a keyboard shortcut to add a clip marker in the same color to the position of an existing clip marker, the existing clip marker will be deleted. When multiple clip markers have been set, all of the existing clip markers will be deleted.
Setting Clip Markers with Range
You can set clip markers with range to source clips registered to the bin and to the source currently displayed on the Player.
-
The default color of clip marker is orange. The color of clip markers can be changed on the [Clip Marker] list.
1) Display the source on the Player.
2) Set the In and Out points to source clips.
3) Click [Set Marker In/Out] in the [Clip Marker] list.
-
The clip marker with range is set to the slider on the Player, and the timecode and duration of the In and Out points of the clip marker are displayed on the [Clip Marker] list.
 Alternative
-
Right-click the clip marker list, and click [Set Mark In/Out].
-
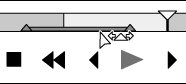
Right-click the slider on the Player, and click [Set clip marker In/Out].
-
Click [Marker] on the menu bar, and click [Add Marker to In/Out Point].
-
In step 1) , the clip marker with range is set with the start of the clip as the In point when the In point has not been set and with the end of the clip as the Out point when the Out point has not been set.
-
You can change the range of the clip marker by clicking [In], [Out] in the [Clip Marker] list or the timecode in [Duration] and entering the numerical value.
-
You can move the marker position by dragging the clip marker with range on the position bar on the Player with [Ctrl] on the keyboard held down.
-
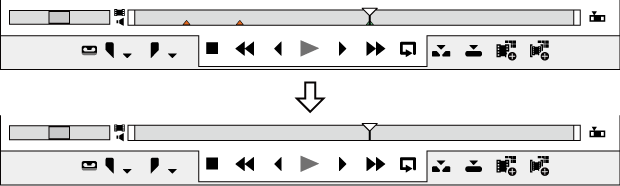
Only the clip marker of the In point is displayed as the clip marker with range when that clip marker is not focused.
|
|
|---|
|
Deleting Clip Markers
You can delete set clip markers.
1) Display a clip set with a clip marker on the Player.
2) Select the clip marker to delete from a clip marker list in the [Clip Marker] list.
3) Click [Clear Marker] in the [Clip Marker] list.
Alternative
-
Drag the clip marker to delete from the clip marker list, and drop it outside the [Clip Marker] list.
-
Right-click on a clip marker to delete from the clip marker list, and click [Clear Marker].
-
Right-click on the clip marker on the position bar on the Player, and click [Clear clip marker].
-
Move the slider on the Player to the clip marker to delete, right-click the slider, and click [Set clip marker/Clear clip marker (Toggle)].
-
Move the slider on the Player to the clip marker to delete, click [Marker] on the menu bar, and click [Clear Mark] → [Cursor].
-
Click [Delete] in the [Edit Marker] dialog box for the clip marker.
-
You can also delete all clip markers in the clip marker list in a single operation by the following operation.
-
Click [Marker] on the menu bar, and click [Clear Mark] → [All].
-
Deleting all markers: [Shift] + [Alt] + [V]
-
|
|
|---|
|
Showing/Hiding Clip Markers
You can switch the show/hide setting for set clip markers for both the display on the Player and the display on the timeline.
1) Click [Marker] on the menu bar, and click [Show Clip Markers] → [Player] or [Timeline].
-
When this item is checked, the clip marker or comment is displayed. This is no longer displayed when this item is unchecked.
Also, the clip marker is displayed on clips on the timeline when [Timeline] is clicked to check it. This is no longer displayed when this item is unchecked.

-
Only comments for clip markers can also be hidden. Click [View] on the menu bar, and uncheck [Marker] in [Overlay].
-
Only the clip marker of the In point is displayed as the clip marker with range when that clip marker is not focused.